This assignment ended up not being required, but I'm going to leave this here anyway. :)
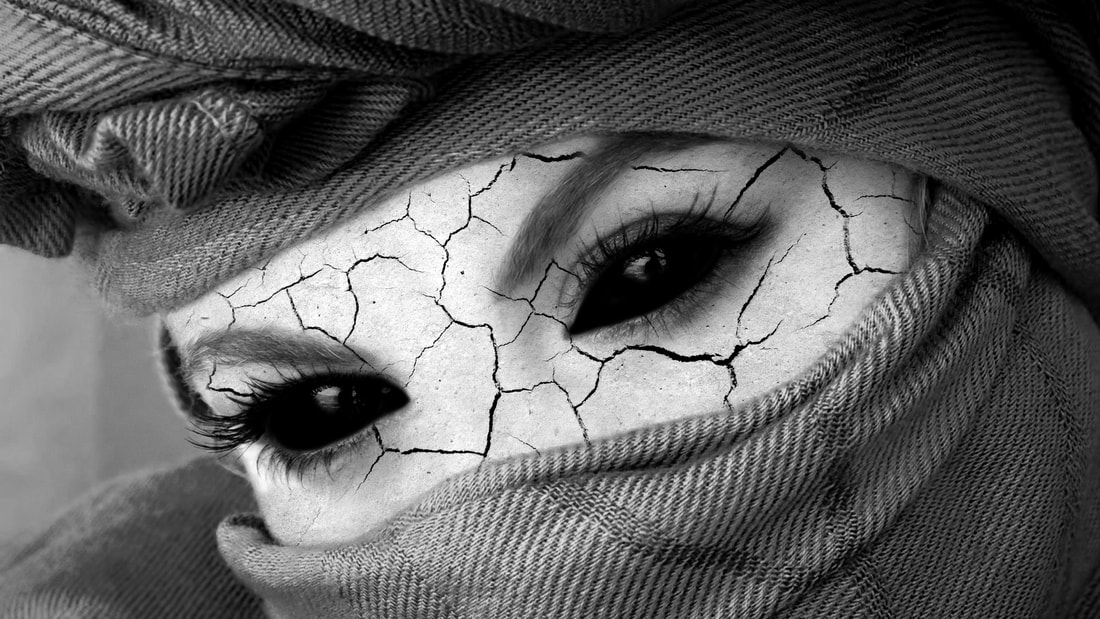
Original image by - Beth Icard
I actually started out playing around with this image weeks ago, just for fun. As I've said before, I'm a huge fan of Supernatural, and I've wanted to learn how to competently create black demon eyes in Photoshop for a while now. I stumbled around for a bit, looked at a couple of tutorials I wasn't happy with, and then found this one that I liked a lot. I borrowed some of the advice from that video, but also kind of did my own thing. But I digress. In short, you can't just paint over someone's eyes with black paint and expect that to be good enough. You have to keep the reflections.
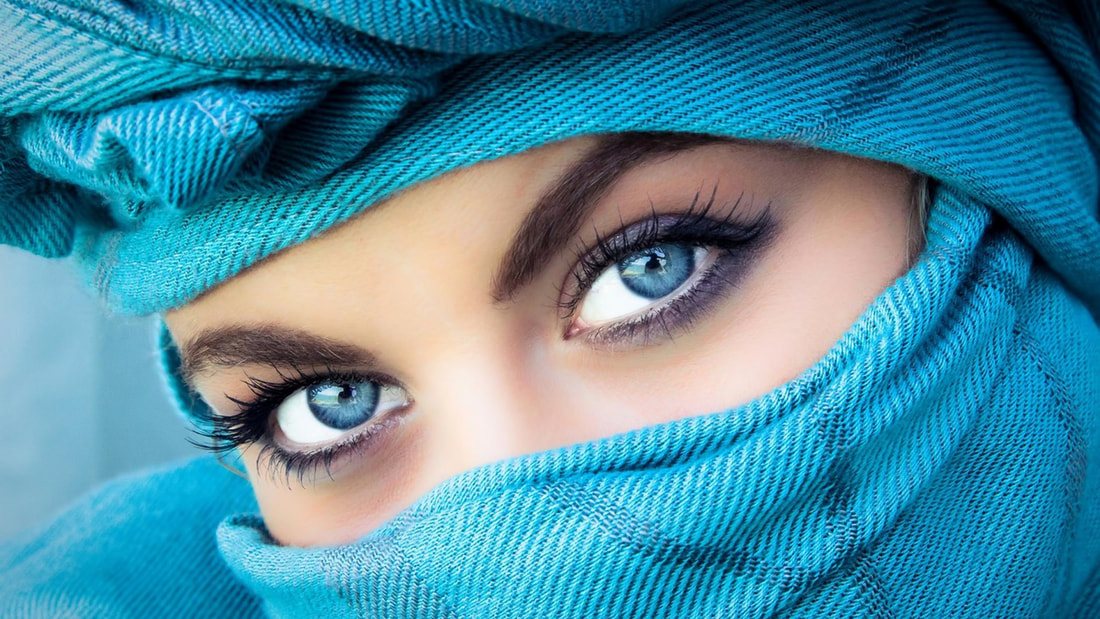
Image found on Pixabay
|
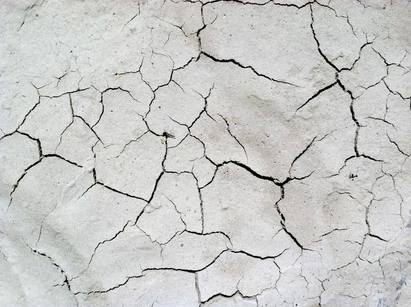
Image found here
|
I've also wanted to try wrapping a cracked texture onto a face since last semester, so I thought I'd incorporate that just for funsies. When this assignment came up, I threw a black and white adjustment layer on just to see what it looked like, and after I manipulated the color settings a little, I decided I liked it even better in black and white than in color.
Process:
- Despite earlier comments to the contrary, you do have to start by painting over the eyes with good old black paint on the brush tool. I covered the eye completely, and then outlined the area with black set at a much lower opacity just to clean up the edges.
- I turned those layers off and manipulated the levels in the blue channel to allow a clean selection of the eye highlights, and then I created a luminosity mask selection of the highlights.
- With the selection made, I painted over the areas where the highlights naturally were with white paint set to a low opacity. I did a couple layers of this until the brightness was what I wanted.
- Now for the displacement map . . . I used a duplicate of the blue channel set to a new destination to create a duplicate in a separate file. I applied a median and gaussian blur filter, converted the image to greyscale, and saved the file as a displacement map.
- I created a selection of the face minus the eyes and saved the selection.
- I oped the cracked texture image in a new layer and, using the selection, placed it where I wanted it.
- I added a layer mask and set the blend mode to multiply.
- I unlinked the texture image from the mask and applied the displacement filter.
- I cleaned up bits and pieces and edges where I felt necessary in the mask.
- I used the healing brush and clone stamp to clean up a couple small areas of the texture image that I didn't like.
- I added the black and white adjustment layer and played with the color levels until I was happy.
Design thoughts:
- I really loved the contrast between the cracked skin texture and the soft fabric of the scarf.
- I also like how the alienness of the demon eyes works with the alienness of the cracked skin against the scarf texture and human shape to make something kind of eerie.
- I used the black and white adjustment layer to pull out highlights and emphasize shadows so the image wasn't so flat.
